-
Table of Contents
Introduction
After harvesting peanuts, it is important to cure them properly to ensure their quality and longevity. Curing involves drying the peanuts to remove excess moisture and prevent spoilage. Here are some steps to follow for curing peanuts after harvest.
Effective Methods for Post-Harvest Peanut Curing
Peanuts are a popular crop that is grown in many parts of the world. They are a rich source of protein, fiber, and healthy fats, making them a nutritious addition to any diet. However, after harvesting, peanuts need to be cured to ensure that they are safe to eat and have a longer shelf life. In this article, we will discuss effective methods for post-harvest peanut curing.
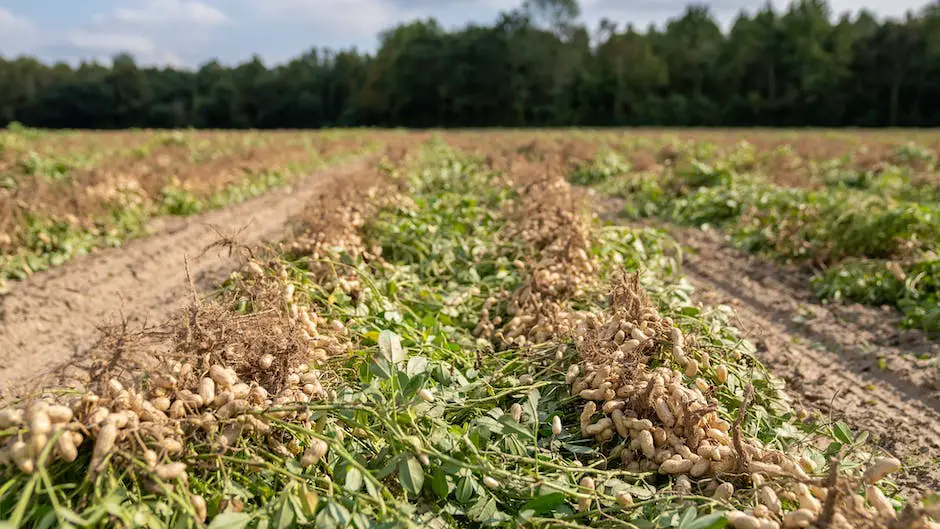
The first step in curing peanuts is to remove them from the field and clean them thoroughly. This involves removing any dirt, debris, or foreign objects that may have gotten mixed in with the peanuts during harvesting. Once the peanuts are clean, they can be sorted by size and quality.
The next step is to dry the peanuts. This is an important step in the curing process, as it helps to reduce the moisture content of the peanuts and prevent the growth of mold and bacteria. There are several methods for drying peanuts, including sun-drying, mechanical drying, and air-drying.
Sun-drying is the traditional method of drying peanuts, and it involves spreading the peanuts out on a clean, dry surface in the sun. This method is effective, but it can take several days to dry the peanuts completely, and it is dependent on the weather. Mechanical drying involves using a machine to dry the peanuts, which can be faster and more efficient than sun-drying. However, it can be expensive to purchase and maintain the equipment needed for mechanical drying. Air-drying is another option, which involves using fans to circulate air around the peanuts and dry them naturally. This method is slower than mechanical drying but can be more cost-effective.
Once the peanuts are dry, they need to be stored in a cool, dry place to prevent moisture from re-entering the peanuts. This is important because moisture can cause the peanuts to spoil or become contaminated with mold or bacteria. The ideal storage temperature for peanuts is between 60 and 70 degrees Fahrenheit, with a relative humidity of less than 70 percent.
There are several methods for storing peanuts, including bulk storage, bag storage, and container storage. Bulk storage involves storing the peanuts in large bins or silos, which can be a cost-effective option for large-scale peanut producers. Bag storage involves storing the peanuts in bags, which can be easier to manage and transport than bulk storage. Container storage involves storing the peanuts in containers, which can be a good option for exporting peanuts to other countries.
In addition to these methods, there are several other factors to consider when curing peanuts. For example, it is important to monitor the temperature and humidity levels during the curing process to ensure that the peanuts are drying properly. It is also important to inspect the peanuts regularly for signs of mold or other contaminants, and to take appropriate measures to prevent contamination.
In conclusion, curing peanuts after harvest is an important step in ensuring that they are safe to eat and have a longer shelf life. There are several effective methods for post-harvest peanut curing, including sun-drying, mechanical drying, and air-drying. Once the peanuts are dry, they need to be stored in a cool, dry place to prevent moisture from re-entering the peanuts. By following these guidelines, peanut producers can ensure that their peanuts are of high quality and safe for consumption.
Step-by-Step Guide to Curing Peanuts for Optimal Quality and Shelf Life
Peanuts are a popular snack and ingredient in many dishes around the world. They are also a valuable crop for farmers, but proper curing is essential to ensure optimal quality and shelf life. Curing is the process of drying and storing peanuts after harvest to reduce moisture content and prevent spoilage. In this article, we will provide a step-by-step guide to curing peanuts for optimal quality and shelf life.
Step 1: Harvesting
The first step in curing peanuts is harvesting. Peanuts are ready for harvest when the leaves turn yellow and the pods are mature. The best time to harvest is when the soil is dry, and the weather is sunny. This will help to reduce the risk of fungal growth and ensure that the peanuts are dry enough for curing.
Step 2: Cleaning
After harvesting, the peanuts should be cleaned to remove any dirt, debris, or foreign objects. This can be done using a mechanical sheller or by hand. It is important to remove any damaged or diseased peanuts as they can spoil the entire batch.
Step 3: Drying
The next step is to dry the peanuts. This can be done using a mechanical dryer or by spreading the peanuts out in the sun. If using a mechanical dryer, the temperature should be set to 35-40°C, and the peanuts should be dried for 24-48 hours. If drying in the sun, the peanuts should be spread out in a single layer on a clean, dry surface and turned regularly to ensure even drying. It is important to protect the peanuts from rain, dew, and moisture during the drying process.
Step 4: Curing
Once the peanuts are dry, they are ready for curing. Curing is the process of storing the peanuts in a well-ventilated area to reduce moisture content and prevent spoilage. The ideal temperature for curing is 25-30°C, and the humidity should be kept below 70%. The peanuts should be stored in a single layer on a clean, dry surface and turned regularly to ensure even curing. It is important to protect the peanuts from rain, dew, and moisture during the curing process.
Step 5: Testing
After curing, the peanuts should be tested for moisture content and quality. The ideal moisture content for peanuts is 8-10%, and the peanuts should be free from mold, discoloration, and off-flavors. If the peanuts do not meet these standards, they should be discarded or re-cured.
Step 6: Packaging
The final step in curing peanuts is packaging. The peanuts should be packaged in clean, dry, and airtight containers to prevent moisture and insect infestation. The containers should be labeled with the date of harvest, curing, and packaging, as well as the moisture content and quality of the peanuts.
In conclusion, curing peanuts is essential to ensure optimal quality and shelf life. The process involves harvesting, cleaning, drying, curing, testing, and packaging. By following these steps, farmers can produce high-quality peanuts that are safe for consumption and have a longer shelf life.
Q&A
Q: How do you cure peanuts after harvest?
A: Peanuts can be cured after harvest by leaving them in the field for 2-3 days to dry out. Then, they can be dug up and hung in a well-ventilated area for 2-3 weeks until fully cured.
Q: Why is it important to cure peanuts after harvest?
A: Curing peanuts after harvest helps to remove excess moisture and improve their flavor and texture. It also helps to prevent mold and other types of spoilage.
Conclusion
To cure peanuts after harvest, they should be left in the field for 2-3 days to dry. Then, they should be dug up and left to dry in a well-ventilated area for 2-3 weeks until the moisture content is reduced to 10%. Finally, the peanuts should be stored in a cool, dry place to prevent spoilage. Proper curing is essential for producing high-quality peanuts with a longer shelf life.
